i-Bolt® Technology
A fastener that not only clamps parts together, but also tells you how well it’s doing it.
Download Brochure
How does it work?
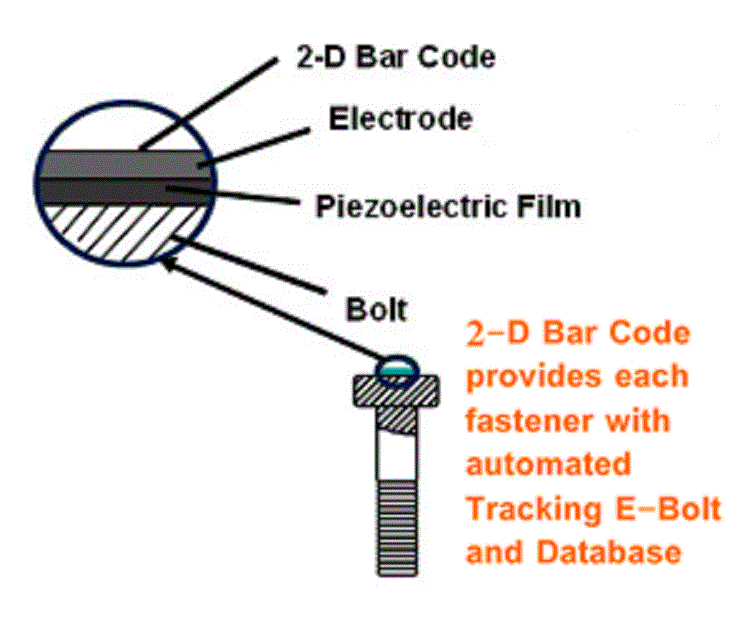
i-Bolt® Technology equips each fastener with a proprietary low-cost, permanent ultrasonic transducer at the top, bottom, or both ends of the bolt. Load measurements are made via the pulse echo technique to 3σ accuracy better than ±3%. Each instrumented bolt is also equipped with the i-Bolt® patented transducer-embedded 2D-barcode. Every fastener is fully traceable and includes a database and automatic data logging. There is no special fastener preparation, no acoustic coupling problems, and no highly-trained technician requirements as is the case for removable ultrasonic solutions.
Challenging economic, environmental and safety demands keep driving up the costs of design, production, maintenance, and repair for the Automotive, Aerospace, Industrial and Construction communities. Overwhelmingly, the biggest portion of these costs is directly related to assembly of joints, maintaining joint integrity and dealing with bolted joint failures. It is a never-ending cycle as joint integrity and joint failure concerns lead to over-design of fasteners utilized in the different applications, which further increase weight and cost.
Most joint failures are not due to the joint design or the fastener. More often, they are the result of insufficient or inconsistent clamp load at assembly. Problems such as bolt fatigue and vibration loosening, which account for over 75% of all bolted joint failures, can usually be prevented by achieving and maintaining a correct level of clamp load in the joint. A variation in installed fastener clamp load of ±30% and ±15% is typical with tightening control methods based on the measurement of applied Torque and Torque-Angle respectively. No post-assembly direct load inspections are possible with these techniques. Furthermore, in multiple bolt joints, much of this initial bolt clamp load can be lost as adjacent bolts in the joint are tightened. Load indicating or crushable washers (i.e., washers which deform when a specified load has been reached) are generally inaccurate, and only indicate that a bolt was, at one time, at the required load. It may have since lost most of its initial clamp load as adjacent bolts were tightened. Consequently, load-indicating washers are mostly used only for inspection purposes to indicate that a bolt was tightened.
Achieving high consistent clamp loads in bolted joints during assembly is essential for bolted joint integrity and eliminating costly and often disastrous failures. Non-destructive post-assembly direct load inspections are also vital and significantly reduce maintenance and repair costs. Load Control Technologies i-Bolt® Ultrasonic Fastener Systems provide precise direct measurement of load in fasteners during assembly and inspection. Clamp load measurements are made to accuracies better than ±3% (3σ) for assembly and ±5% (3σ) for inspection, independent of who the operator is, and also allowing for more economical and efficient joint designs.
The i-Bolt® Ultrasonic Fastener System is the complete solution for bolted joint integrity making it possible to tighten and inspect directly to load instead of torque or torque-angle.
i-Bolt® technology is applicable to all fasteners and all tools resulting in shorter assembly times and reduced manufacturing costs. It is the only solution that provides unique traceability of each fastener with automatic data logging and a database for each individual bolt. No other solution can guarantee i-Bolt®’s ±3% (3σ) tightening load accuracy. Furthermore, these accuracies are also achievable with impact tightening tools opening the door to many applications where their use is forbidden due to torque control inaccuracies. Achieving and maintaining the design load in a bolted joint is now a reality – a reality which results in the prevention and elimination of most joint failures, and also yields significant cost savings.

